Overview
Artifacts provide modelers with the capability of showing additional information about the process that is not directly related to the flow.
Artifacts are found in the Palette. There are five types provided by default, and a user-defined Custom Artifact.

ELEMENT |
DESCRIPTION |
NOTATION |
|---|---|---|
Group |
An artifact that provides a visual mechanism to group elements of a diagram informally. The Group can be used for documentation or analysis purposes, without impacting process flow. |
|
Annotation |
Is a mechanism for a modeler to provide additional information for the reader of a BPMN Diagram. To include line breaks in the text use CTRL+ENTER |
|
Image |
Enables images stored on your computer to be inserted in the diagram. |
|
Header |
Shows the diagram’s properties. |
|
Formatted Text |
This artifact enables you to insert a rich text area into the diagram to provide additional information. |
|
Custom Artifact |
A user defined artifact. Artifacts provide the capability of showing additional information about the process that is not directly related to the flow. |
|
To include an Artifact select it from the Palette and drag and drop it onto the diagram.
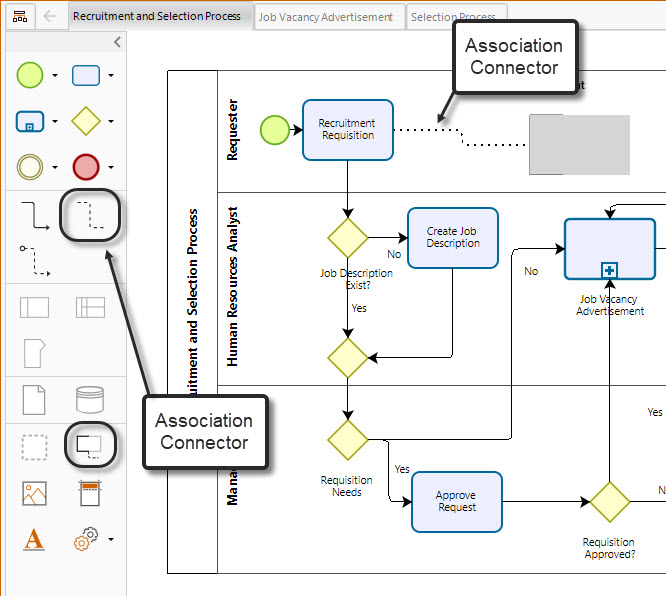
To connect an artifact with an element use the Association Connector.
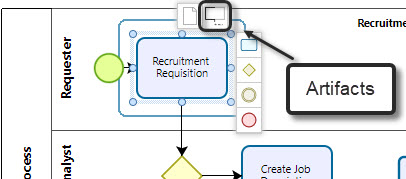
Some artifacts can be placed on the diagrams using the Pie Menu as shown in the image below.
Click on the element, select the Artifact and then drag and drop it appropriately.
Hide artifacts
To hide artifacts from the diagram, tick the corresponding check-box on the View menu in the show section of the Ribbon. Keep in mind that it only hides the artifacts visually, therefore if you publish the diagram all artifacts appear on the publishing. If the option is ticked and you add other artifact from the palette, a notification appears to inform that you must disable this option to add it.

Custom Artifacts
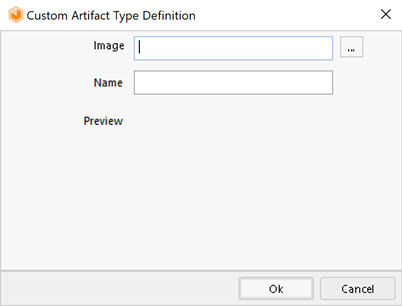
You can create your own Artifacts using the Custom Artifact  button found in the Palette.
You can attach any stored image onto a Custom Artifact. Browse and select the desired image and name it. Click the OK button .
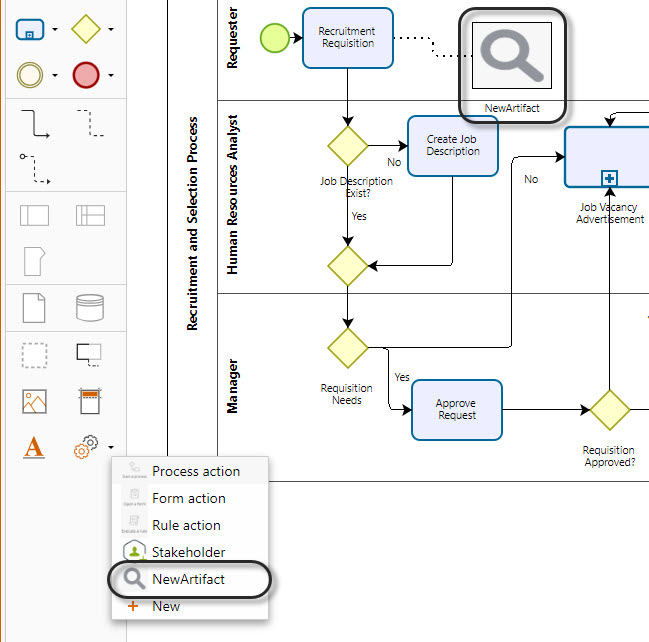
Your newly created Custom Artifact will now display in the Custom Artifact group on the Palette.
To include your new Artifact in the diagram, drag and drop the Custom Artifact from the Palette.
Manage Custom Artifacts
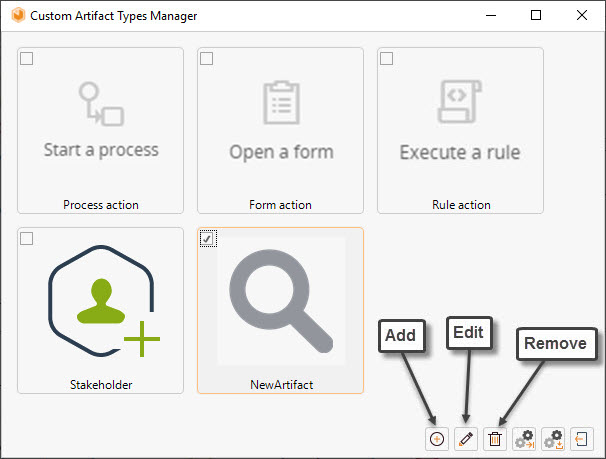
To add, edit or delete Custom Artifacts select Custom Artifacts, located in the Tools group on the Tools tab.

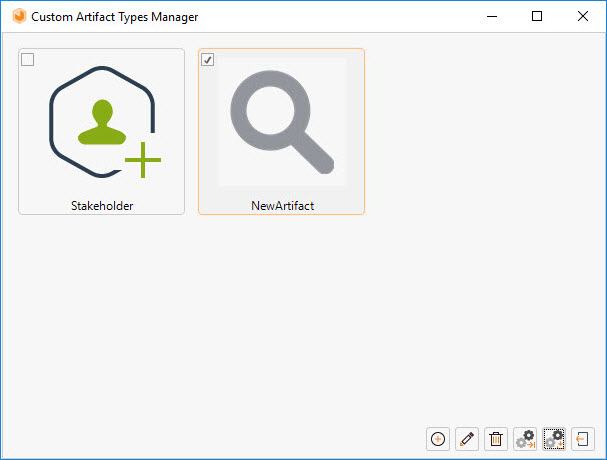
A new window containing all Custom Artifacts will display for the current Model.
The command buttons located at the bottom of the screen will allow you to manage your Artifacts. The command buttons are New, Edit, Delete, Export and Import.
Exporting and Importing Artifacts between Models
You can share the Custom Artifacts you have created to use them in other models. First you need to export a file (.bca file extension) to a folder of your choice. Thereafter import the file to the model where you wish to use the artifacts.
Export Custom Artifacts
In the Model where you have created the Custom Artifact, select Custom Artifacts, located in the Tools group on the Tools tab.

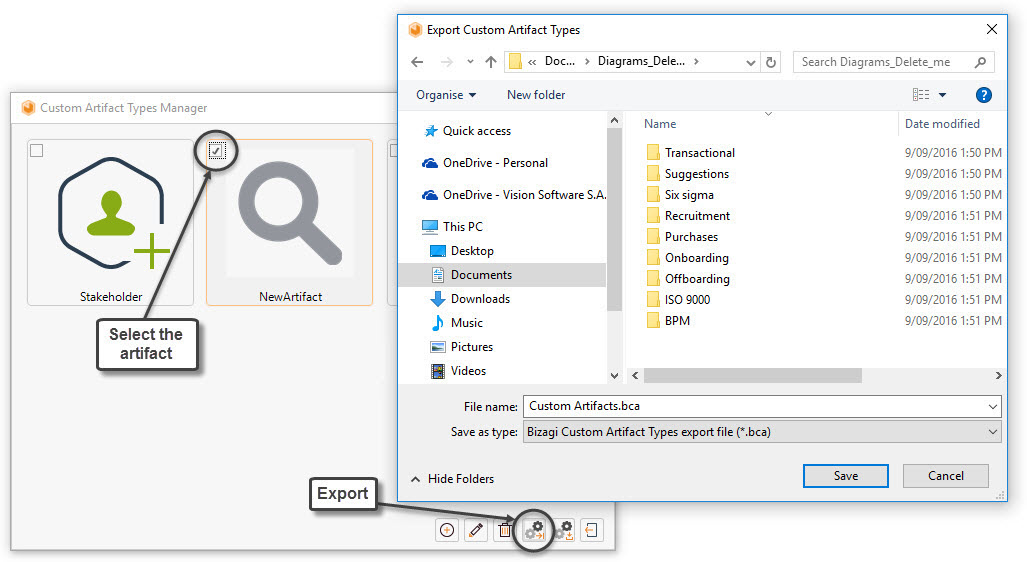
Select the Artifact that you wish to share and click the Export button ![]() .
.
Choose the a folder where the file is to reside, name your file and click the Save button. Make sure the export folder has read and write permissions.
Import Custom Artifacts
Once you have saved the artifact in a file, you can import it to any Model.
Open the Model where you wish to import the Artifact and select Custom Artifacts, located in the Tools group in the Tools tab.

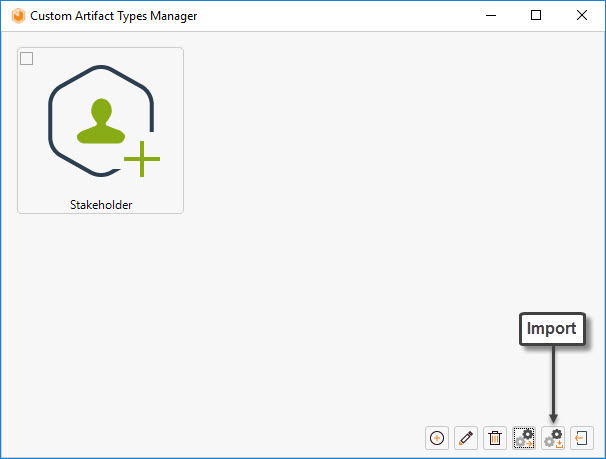
Click the Import button.
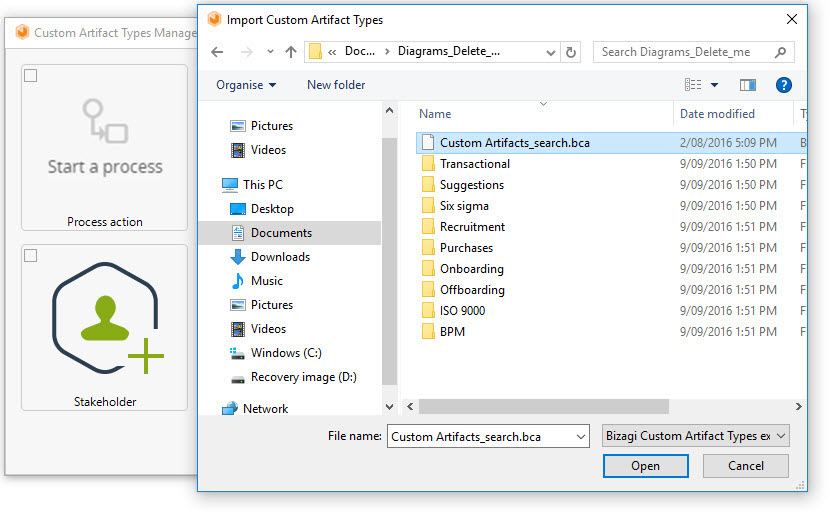
Select the exported file name and click the Open button.
Now your attribute is available to use in the diagram.
Last Updated 1/7/2022 2:12:19 PM